Be The Final Boss Troop Guide: What to Buy and What to Skip
A troop-by-troop buying guide for Be The Final Boss: which guards carry your early waves, where damage per population slot is best, and which popular units are a waste of souls.
Quick answer
Buy a guard first — a Blood Gargoyle carries early waves, then level a Bone Guard. Put your shards into Demonic Skeleton Archers, the best damage per population slot in the game. Skip Soul Collector, Necromancer, and every melee except a level 1 Tomb Hound. Run Skull King in front with Bone Guards behind him.
Video source
Written from KingGoose's published Be The Final Boss troop guide, based on his gameplay and his own tested results (max wave 373 at the time of recording). Numbers quoted are his on-screen readings — verify prices and stats in-game before spending.
KingGoose — Be The Final Boss Troop GuideTroop buys, step by step
- 1
Start with a guard, not a damage dealer
A guard keeps your backline alive. Get a Blood Gargoyle first — it carries to around wave 150 with a decent backline. Iron Skeleton is a workable alternative, or start levelling a Bone Guard: its HP and taunt matter more than its damage, and the video's own fourth-strongest unit is a regular Bone Guard. Mighty Orc is a solid stopgap before Skull King, who heals more and hits harder; neither needs levelling, so buy the normal version — Demonic if you can afford it.
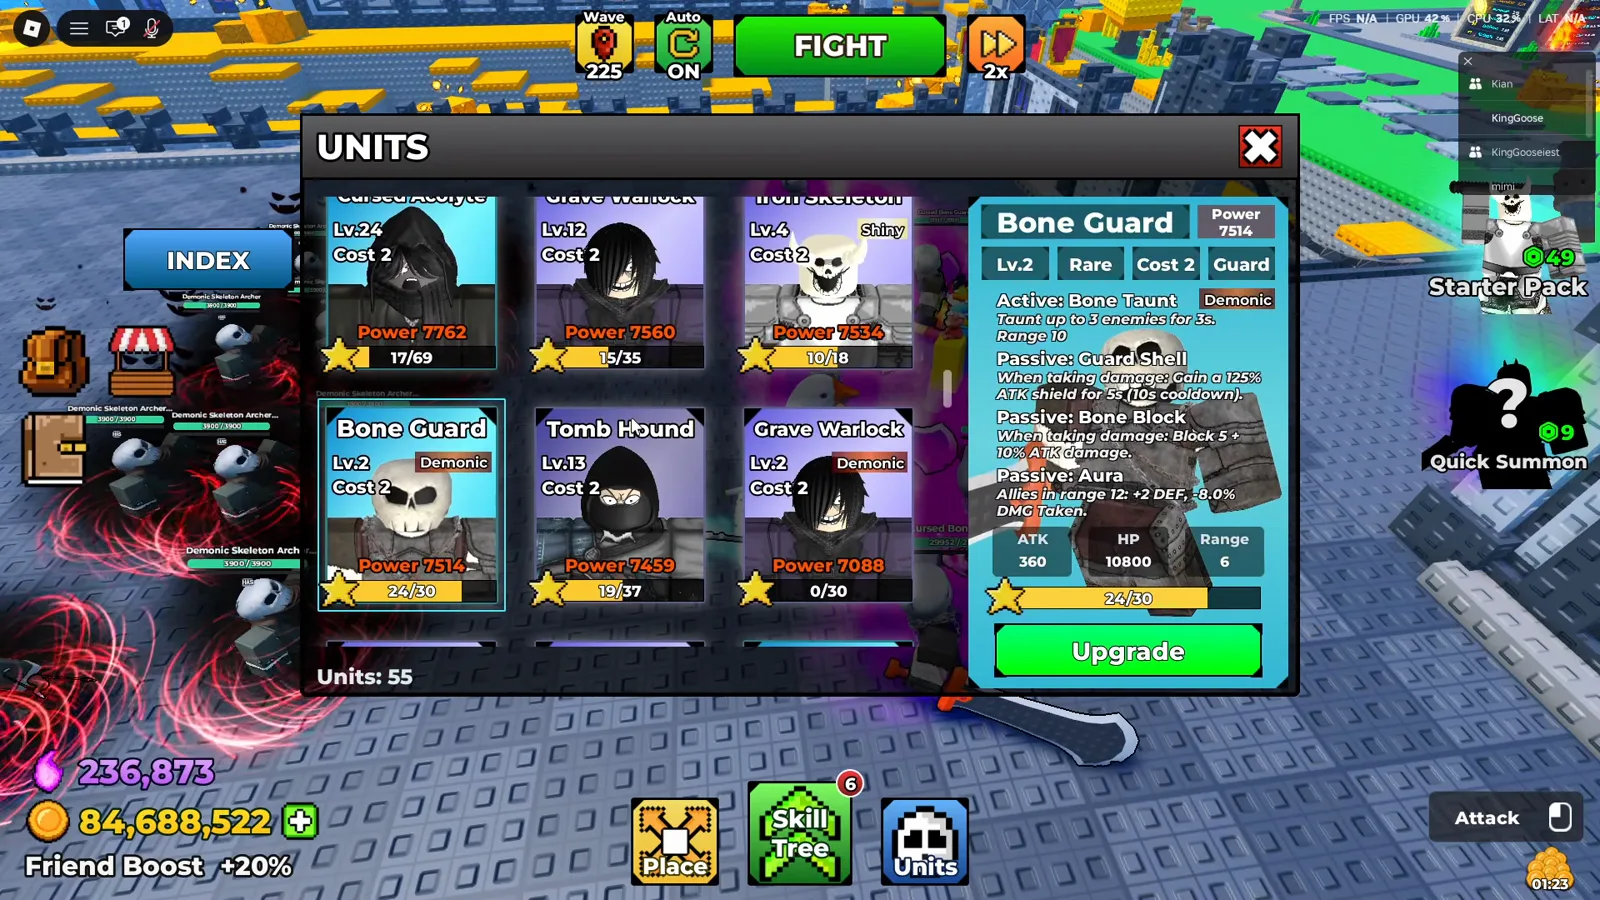
A guard is your first buy — the Bone Guard taunts heroes and its aura cuts damage taken by the units behind it. - 2
Demonic Skeleton Archer is the DPS benchmark
His level 16 archer reads 3,000 ATK and 3,000 HP on screen for a single population slot. The Warlock ranks second in damage but costs 3 slots — two archers roughly match it and still leave a slot free. The archer's Uncommon tag looks weak in your base; star upgrades are what turn it into your main damage source.
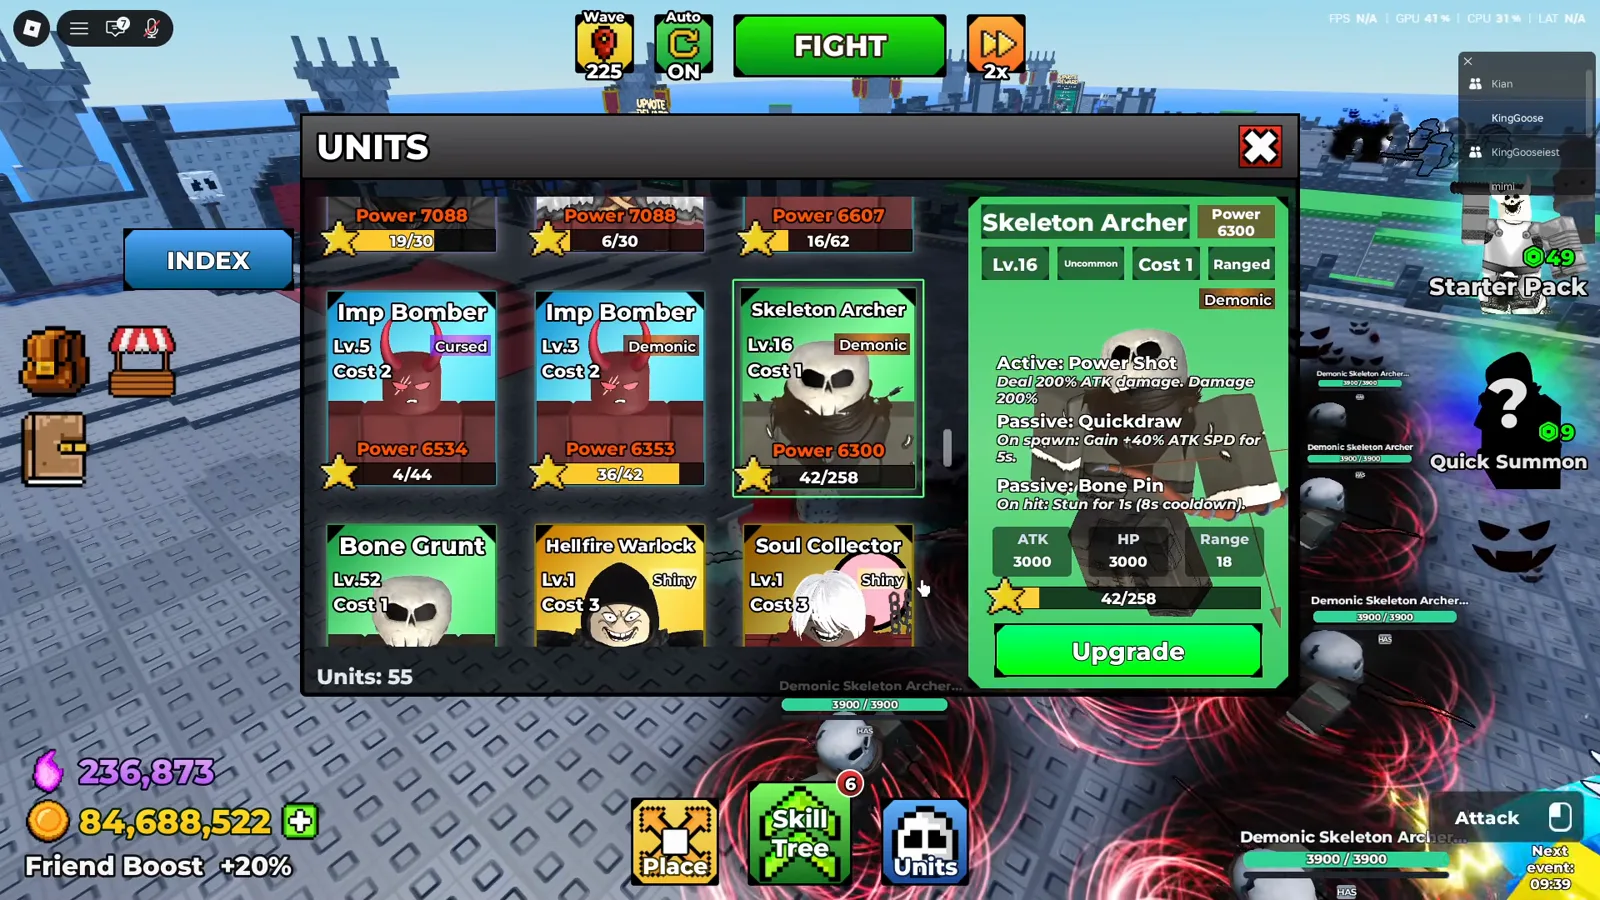
Level 16 reads 3,000 ATK and 3,000 HP on one population slot — the video calls this the best DPS per cost. - 3
Skip the popular traps
Supports: Necromancer is the only borderline one — his test landed about 20 waves under his max versus just fielding more Skeleton Archers. Soul Collector looks cool and everyone uses it; on his screen a level 1 Soul Collector shows 975 ATK against the archer's 3,000. Melees: only a level 1 Tomb Hound ever earned a slot. Don't buy Demon Butcher or Demon Lord — he has watched players sink 200,000 souls into Demon Lord and lose about ten hours of progress. Ignore high levels running Demonic Barbarian; he has never seen one out-damage him.
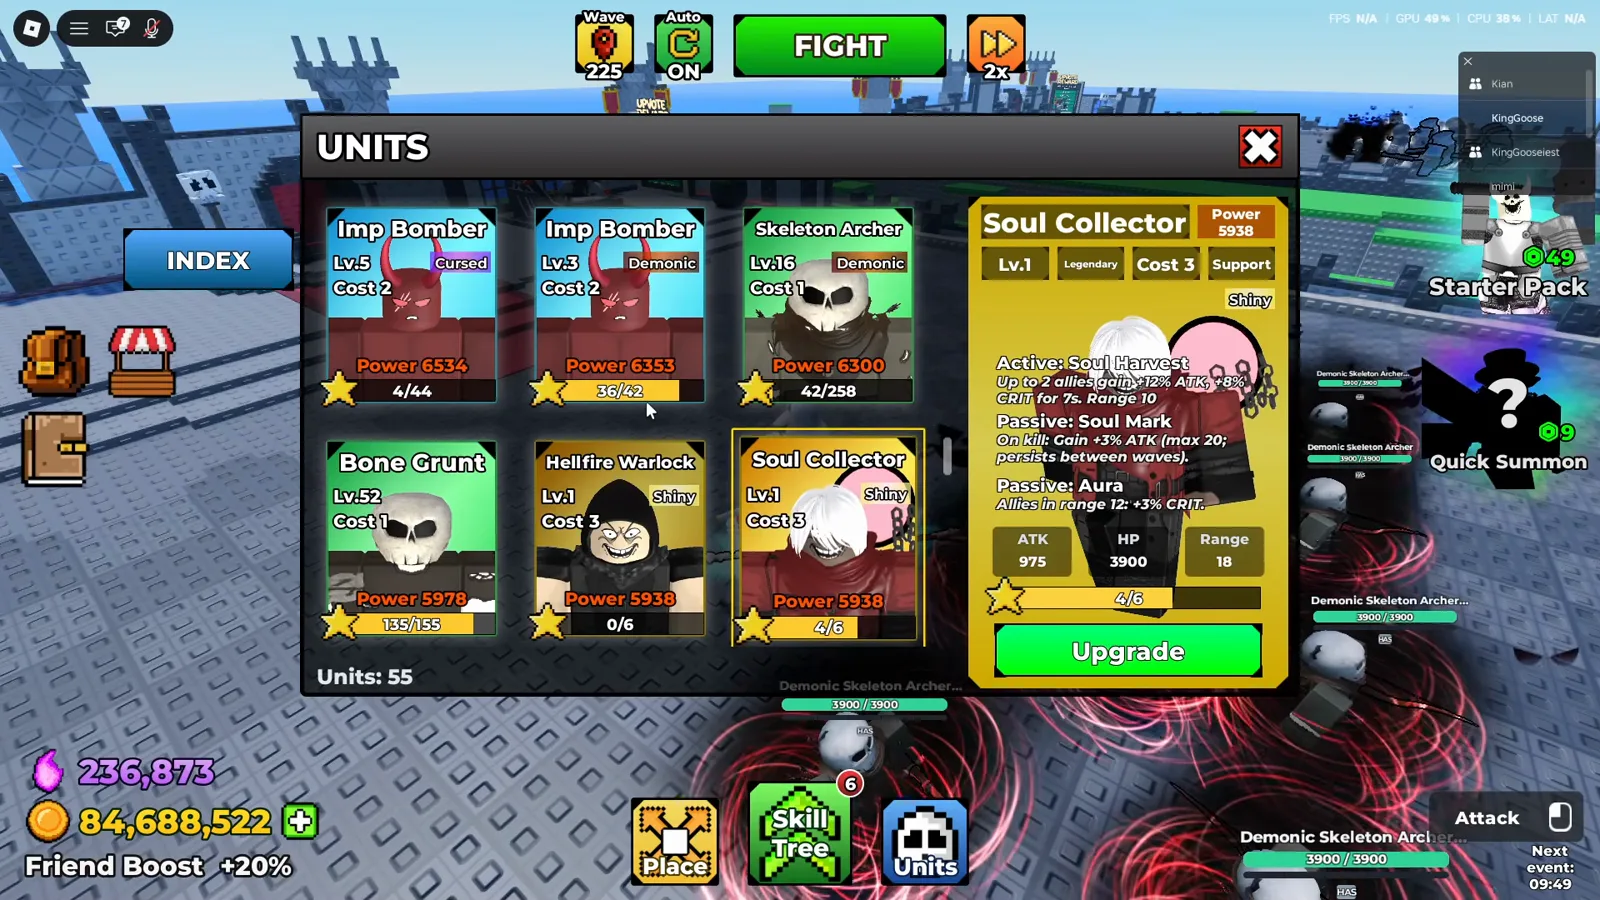
Soul Collector looks impressive at level 1 — 975 ATK next to the archer’s 3,000 is why the video says to skip it. - 4
Spend shards where upgrades compound
Cheap units that level fast beat rare units you will never upgrade. He estimates five Legendary Fusion Shards used in total, and he won't burn uncommon shards promoting units for a slight buff. Shards funnelled into Skeleton Archers pay off quickly — that discipline took him to wave 373 in roughly two days of play. While you grind, add friends: the HUD shows a 10% money boost per friend, +20% with two.
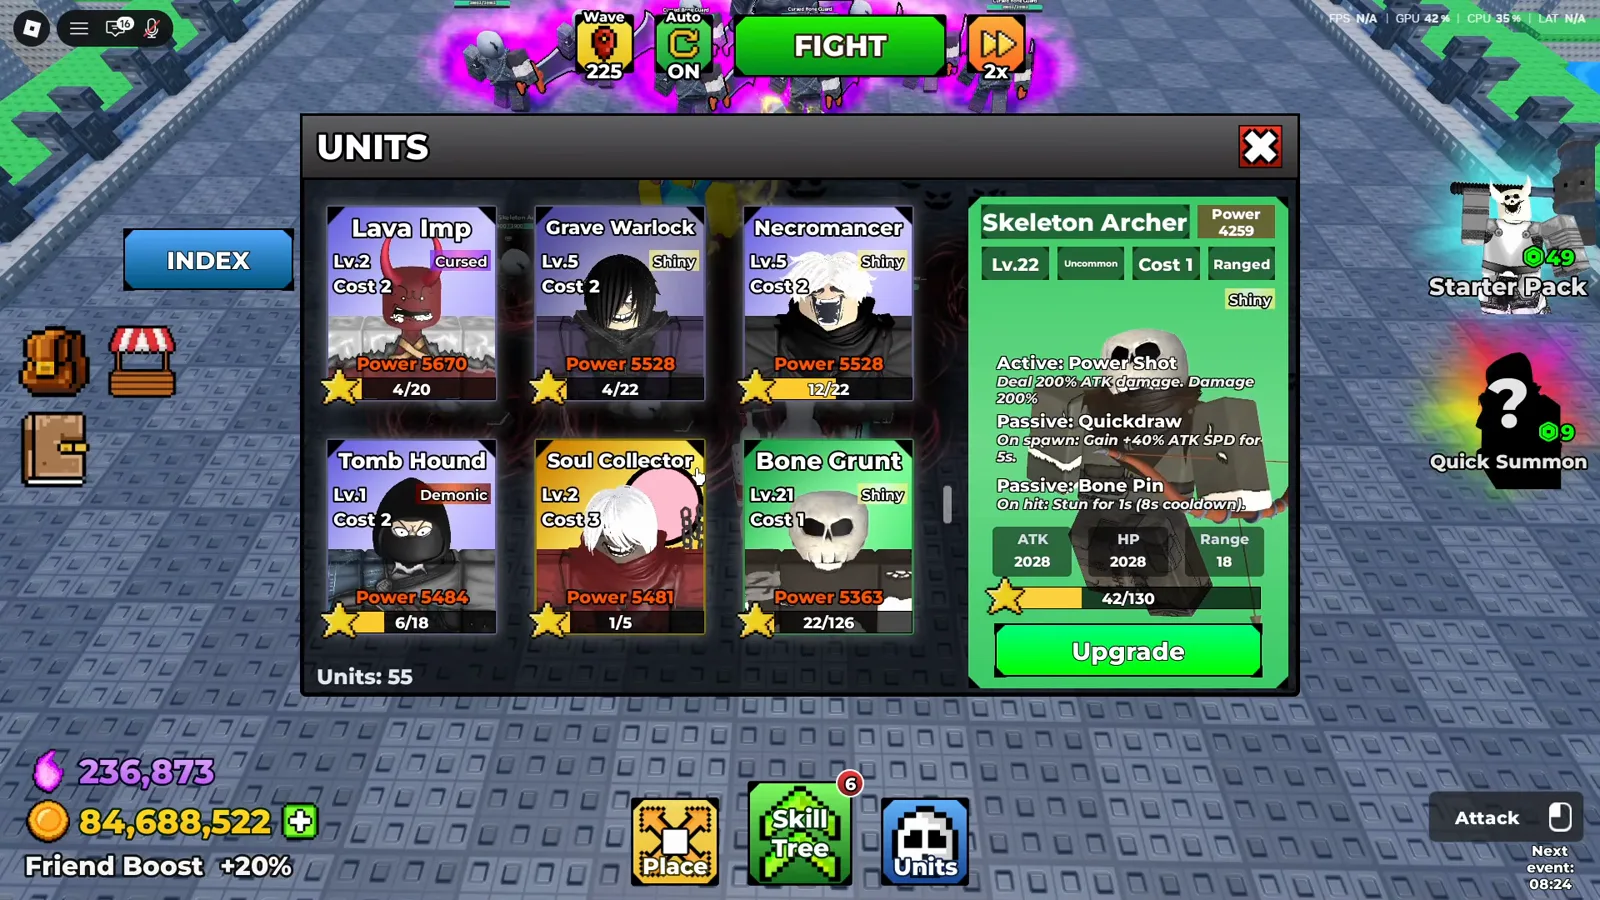
Shards go into units that upgrade fast — star levels are what turn an Uncommon archer into your main damage source. - 5
Formation: Skull King absorbs, guards shield, archers kill
Put Skull King at the front — he heals himself, so he absorbs damage all run. Bone Guards behind him reduce the damage he takes through their passives, which keeps the setup sustainable when pushing. Flankers that slip past die to the archers before doing much. For farming lower waves, more Skull Kings is fine; for pushing your max, run this formation.
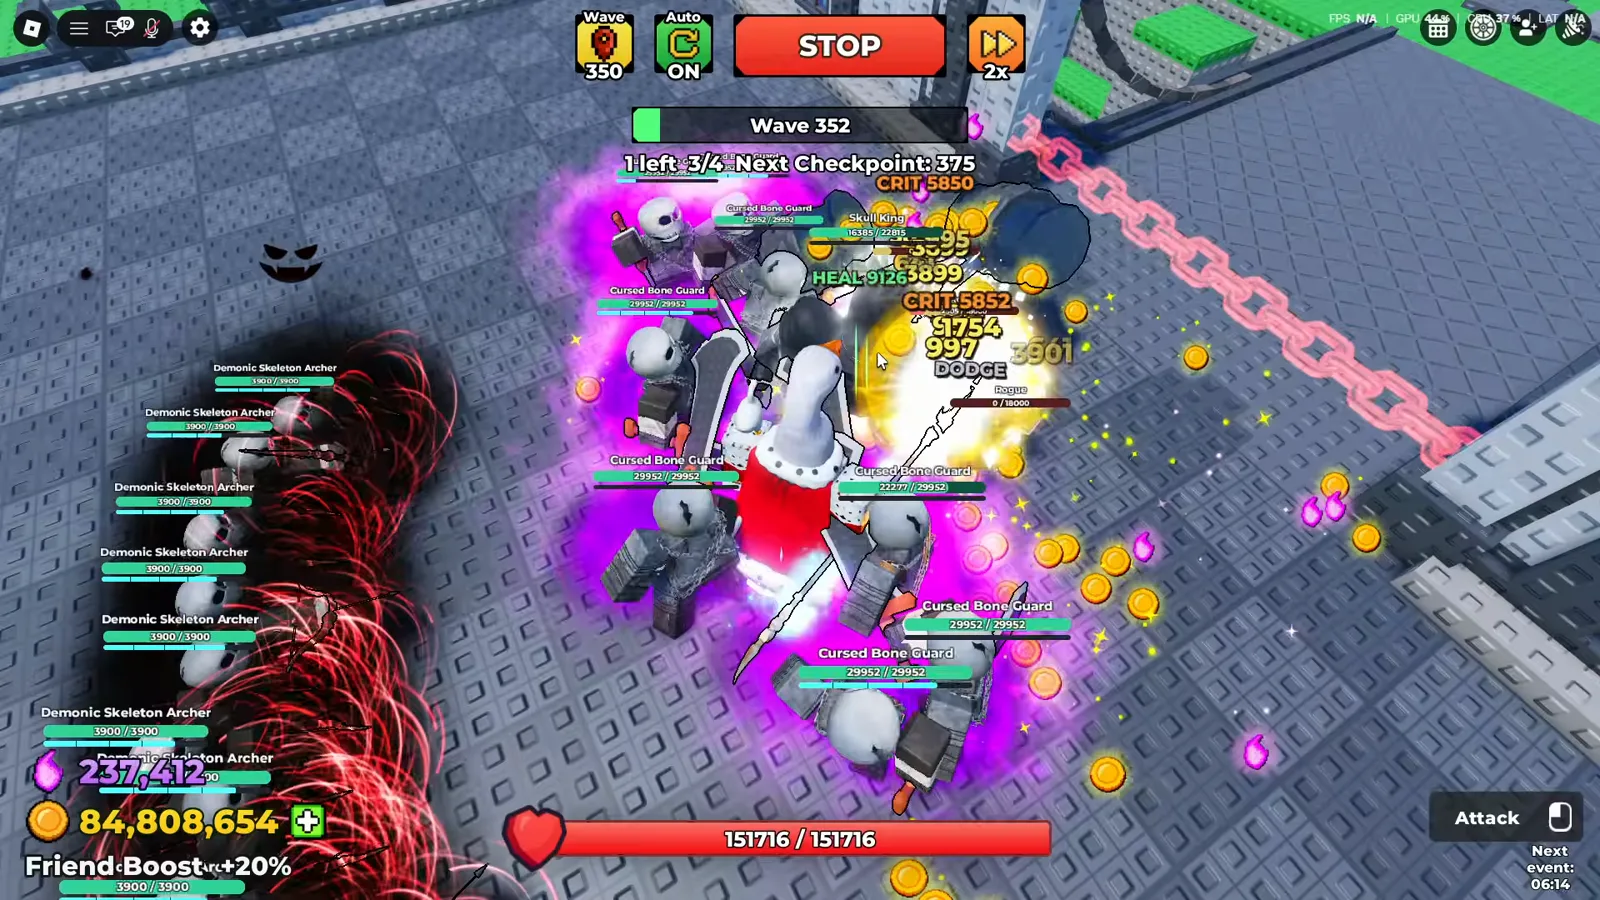
Skull King tanks and heals himself, Bone Guards reduce the damage he takes, and the archers stay untouched behind them.