
Best Base Layout: Mid-Game Formation, Tile by Tile
KingGoose reviews viewer-submitted bases wave by wave. The corrections repeat every time: flank guards, 8-9-tile archer depth, shard priorities, and the wave 1500 case.
One layout keeps passing the review: guards on the flanks, archers deep
This page condenses a video where KingGoose grades real player bases one by one. The passing setups do the same four things: cover both flanks with guards, mass skeleton archers about 8-9 tiles back in a formation three rows deep, push guards 2-3 squares forward, and spend shards on bone guards plus demonic skeleton archers instead of Skull King. The footage was recorded in the Update 3 era (~July 2026), so read the tile counts and ratios as that video's observations; later end-game approaches, such as guard-less pure demonic archer lines, are not demonstrated or verified in this material.
Source video
"I reviewed YOUR bases + Update 3 Leaks!" by KingGoose (24:05, YouTube), recorded around Update 3 (~July 2026). Every placement number, level benchmark and the wave 1500 case below is read from the reviewer's own screen or the submitted base screenshots shown on it; each step lists where to watch.
KingGoose — I reviewed YOUR bases + Update 3 Leaks!Formation rules from the review
- 1
Put guards on both flanks
The most repeated fix in the video. A wave 270 base gets a 3/10 mostly for leaving archers exposed, and another player is told to drop one unit and add a bone guard on the left and one on the right, because archers standing alone — especially at low level — get picked off by ranged heroes. The wave 475 base shown here passes the eye test because its guards curve around the front and both sides of the archer mass.
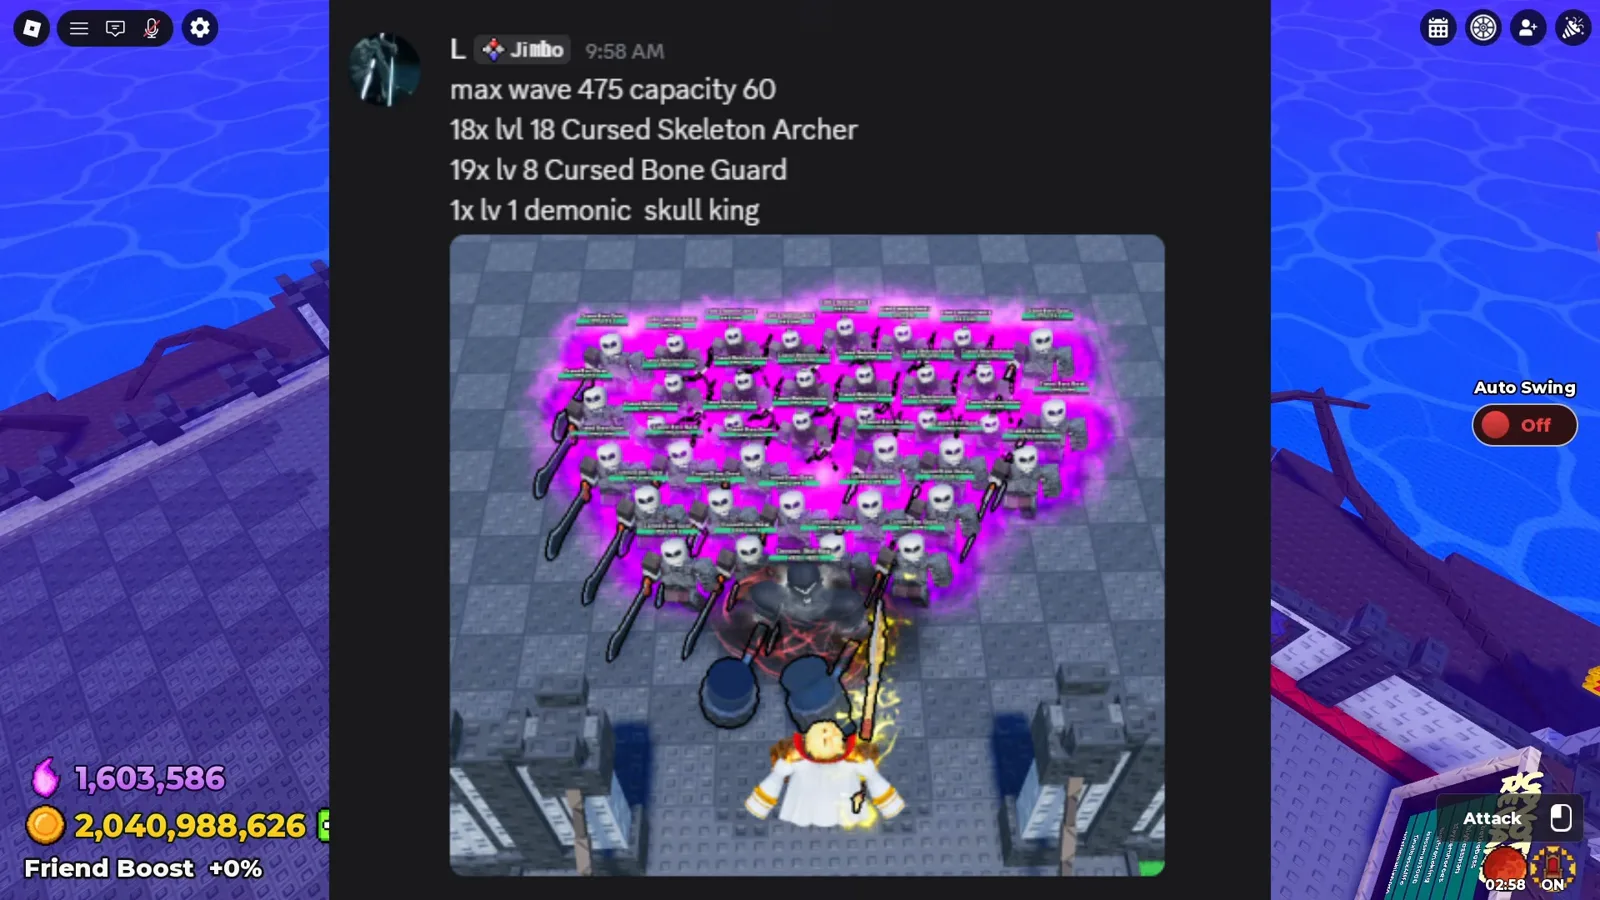
Guards covering both flanks is the review's most repeated fix — uncovered side archers get picked off first. - 2
Set the depth: archers 8-9 tiles back, guards 2-3 forward, three rows
Counting tiles on his own screen, the reviewer places archers about eight or nine tiles from the front line, with guards meeting heroes 2-3 squares further forward. A wave 450 player whose whole formation sat too far back is told to move everything up by two or three squares. Depth matters too: he starts his front row three tiles deep, not four — "it does actually affect more than you think."

Counted on screen: archers about 8-9 tiles back, guards pushed 2-3 squares forward, front row three tiles deep — not four. - 3
Spend shards on bone guards and demonic skeleton archers, not Skull King
Almost every stalled base in the video is a levels problem, not a placement problem. The standing advice: don't dump shards into Skull King — keep him in the lineup until roughly wave 375-400, when guards replace him — and push bone guards plus demonic skeleton archers instead. Benchmarks from the video: bone guards around level 20 to get past wave 600, and at wave 825 about ten more guard levels and seven more archer levels before pushing past 900.
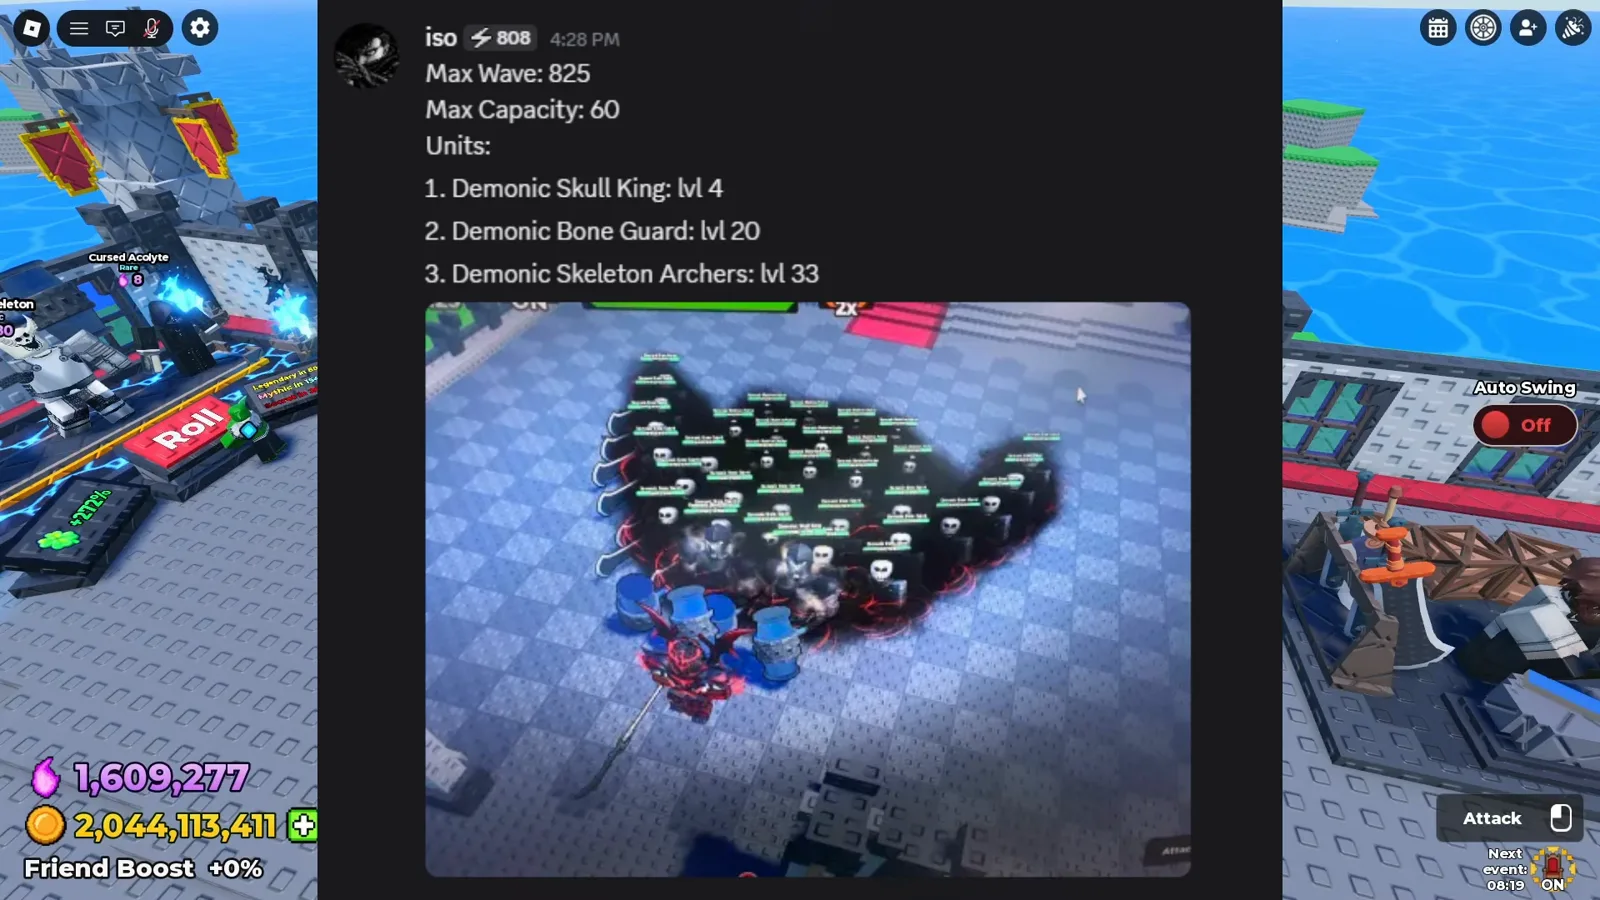
Levels, not placement, gate the push past wave 900 — the reviewer asks for about ten more guard levels and seven more archer levels here. - 4
Late game, shift the ratio toward guards
As waves climb, ranged enemies strip archer health even through damage reduction — the reviewer points at about 10k damage already stacked on his own guards and remembers exactly when that stalled his own run at 900. His fix: more guards, fewer archers. The top submission at max wave 1500 runs 40 population as 20 bone guards and 20 skeleton archers — a split the reviewer reads as a 2:1 population ratio — and his named next investments are the 10B weapon and Demonic Demon Lord, a long secret-shard grind expected to replace archers at the very top end.
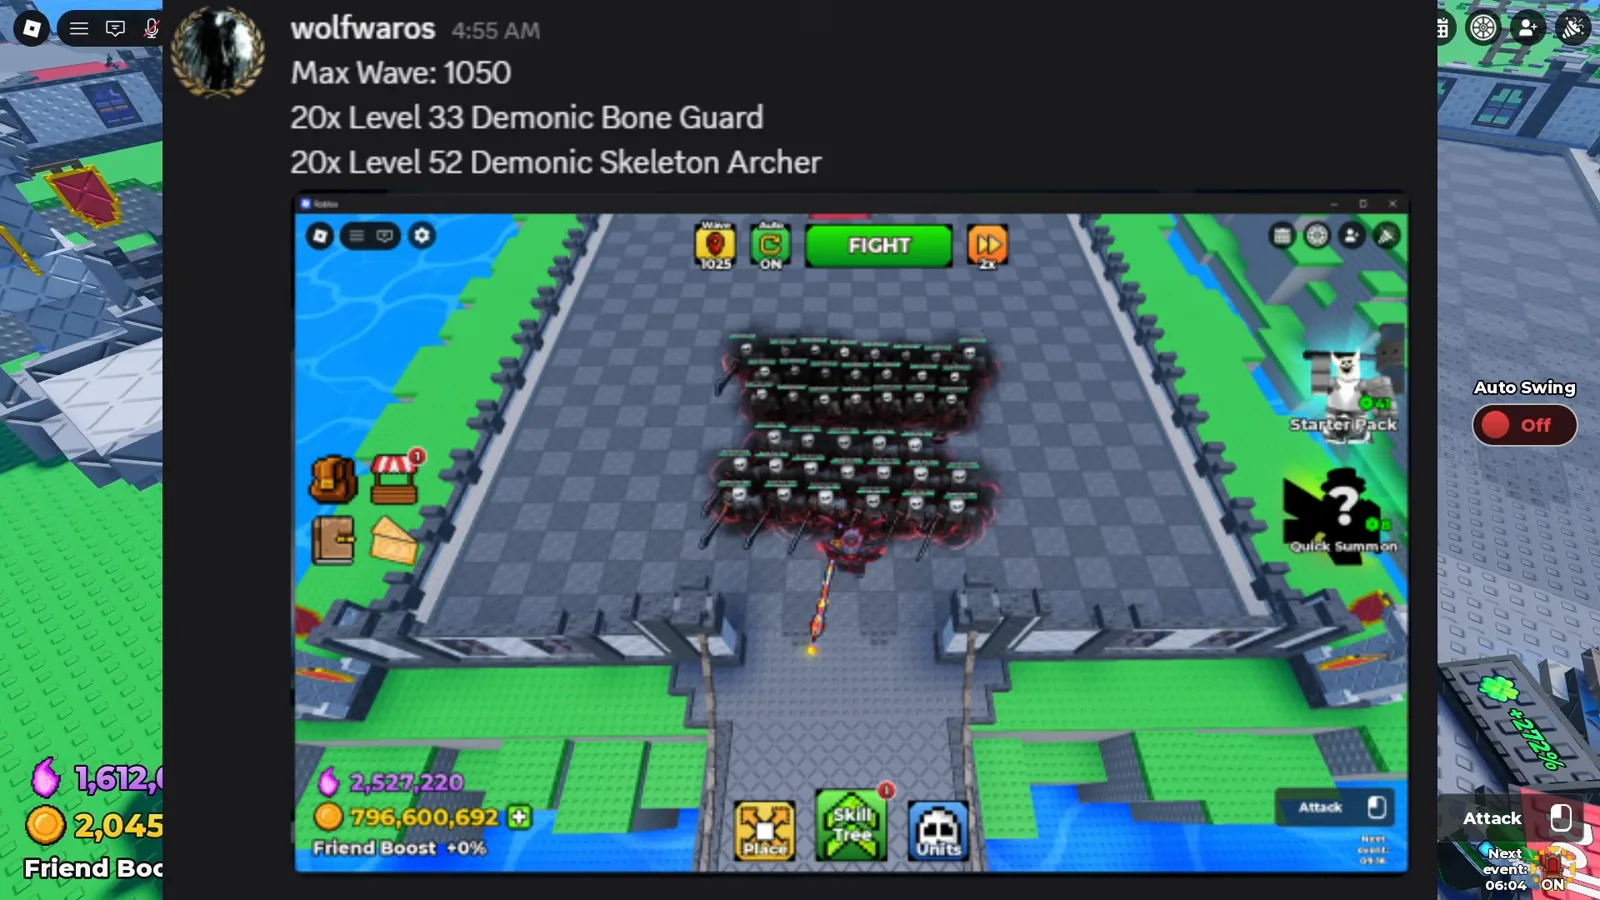
The video's top base splits 40 population into 20 guards and 20 archers; the 10B weapon and Demonic Demon Lord are named as the next investments. - 5
When population is maxed, the skill tree carries you
One submitted base had maxed population yet sat under its wave ceiling; the answer for that player — and the video's general stance — is the skill tree. The on-screen priority: castle buff first, then population, then the bottom progression nodes; coins stay useful on the way to elite units, and throne power waits because it is the expensive one.
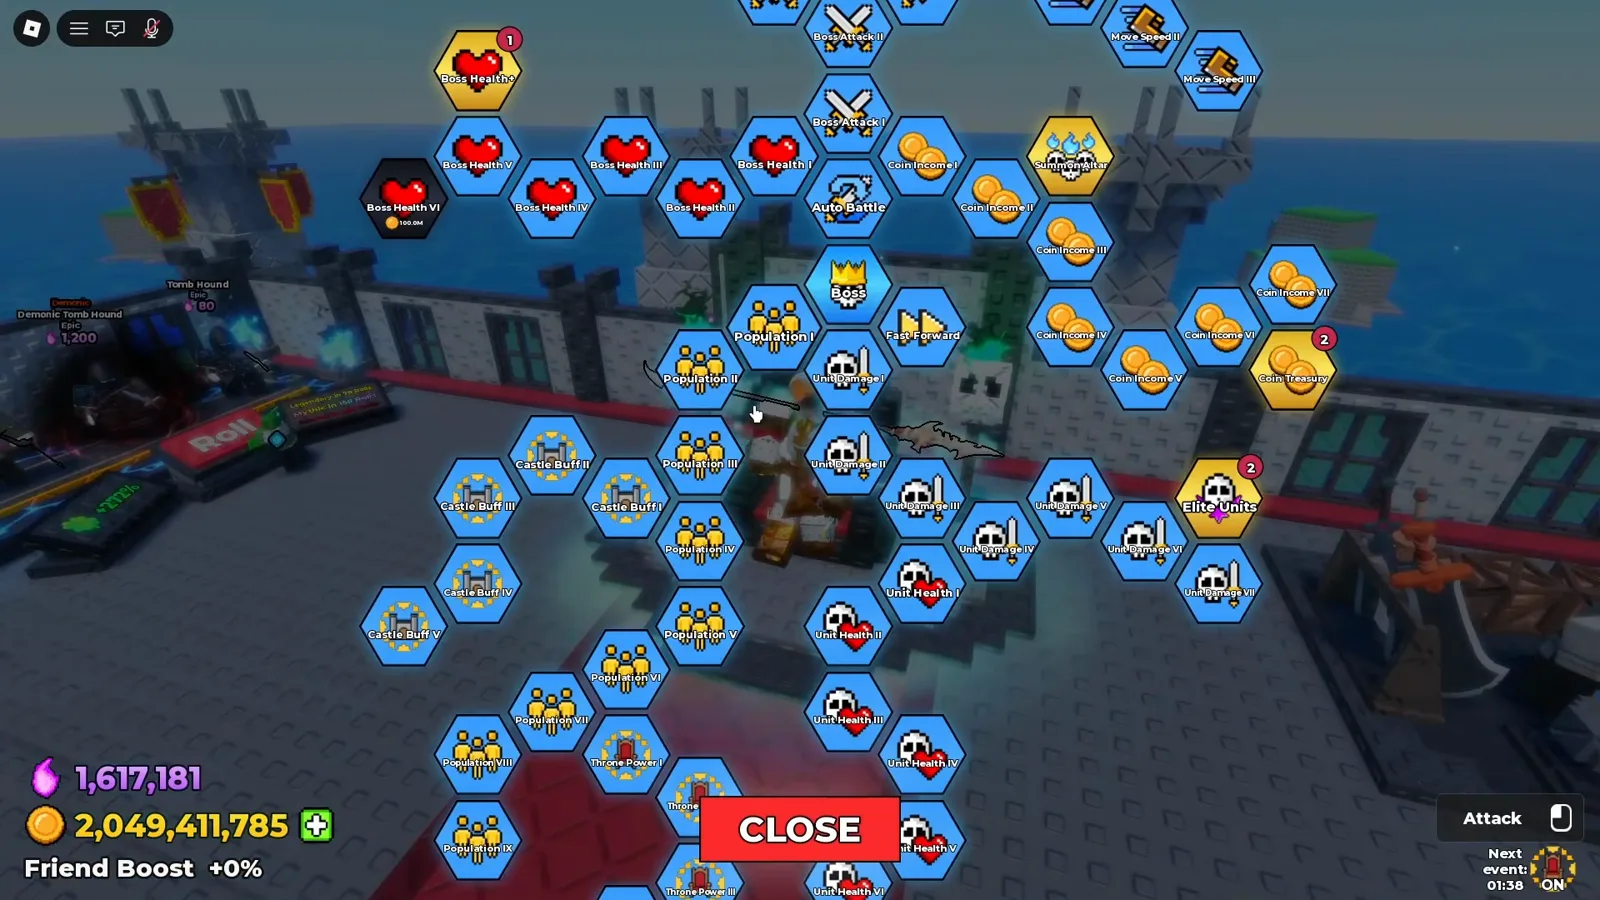
On-screen order: castle buff, population, the bottom progression nodes, then coins toward elite units — throne power waits because it is the expensive one.